Red Velvet Cake for Valentine’s Day
Highlighted under: Holiday Planning
I absolutely love baking this Red Velvet Cake for Valentine’s Day. The vibrant red color always brings a special touch to the celebration, and the rich cream cheese frosting truly elevates the flavors. Each bite is a delicious combination of moist cake and creamy topping that captures the essence of love and indulgence. Not only is this cake a showstopper for any romantic gathering, but making it together can also be a delightful bonding experience. Let's dive into this sweet centerpiece full of affection and flavor!
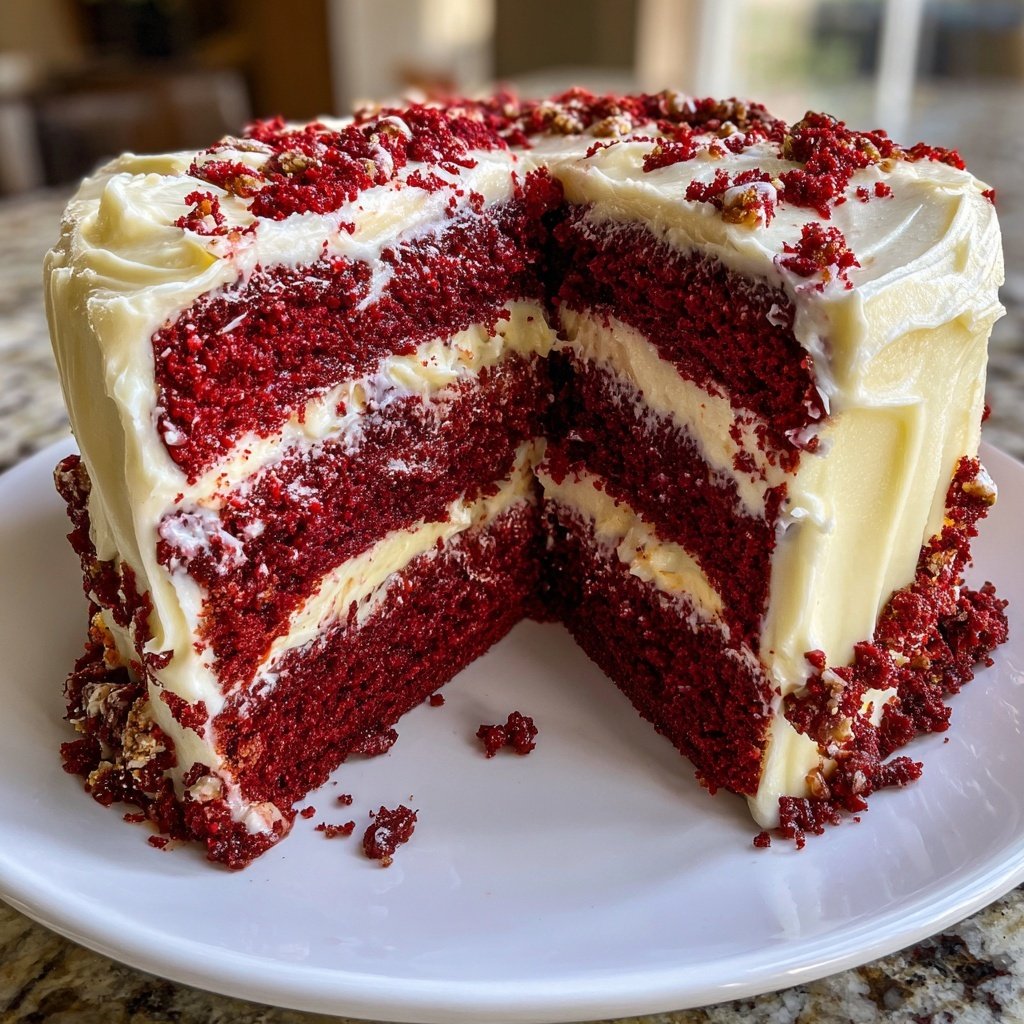
When I first attempted this Red Velvet Cake, I was surprised at how simple it was to create something so beautiful. I followed a classic recipe that emphasizes the balance between cocoa powder and buttermilk, which really enhances the flavor and gives it that unique texture. Each layer melts in my mouth, especially when paired with the tangy cream cheese frosting.
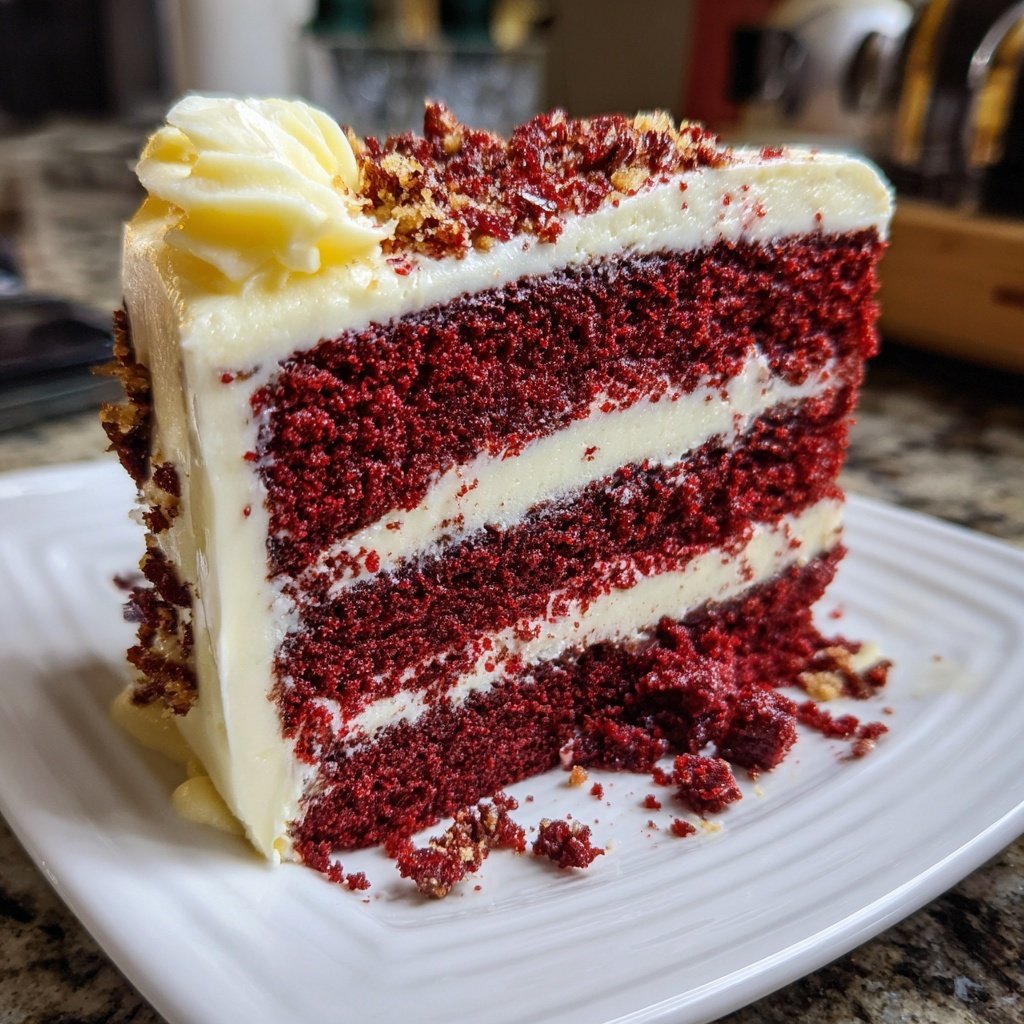
Before serving, I love to let the cake chill for a bit. This not only allows the flavors to meld beautifully, but it also makes slicing easier. Don't forget to sprinkle some red velvet crumbs on top for added flair. Trust me, your guests will be in awe!
Why You Will Love This Recipe
- Vibrant and eye-catching presentation perfect for Valentine's Day
- Rich flavors with a hint of cocoa and a creamy frosting
- A delightful baking activity for couples or friends
Understanding Red Velvet Flavor
Red velvet cake is beloved for its unique flavor, striking a delicate balance of sweetness and a hint of cocoa. The addition of buttermilk not only tenderizes the cake but also brings a subtle tang that complements the cream cheese frosting beautifully. If you're looking for an extra depth of flavor, consider incorporating a touch of espresso powder into the dry mix. This will elevate the chocolate notes without overpowering the signature red velvet taste.
The red color is often achieved through food coloring, but natural alternatives like beet juice can be used for those looking for a less processed option. Keep in mind that using beets will yield a different flavor profile, so be prepared for a slight earthiness in your cake. However, both methods will still create that striking visual appeal that makes red velvet so special!
Frosting Techniques
When it comes to frosting, achieving that perfectly creamy consistency is key. Start by ensuring your butter and cream cheese are at room temperature; this will help in creating a smooth, lump-free frosting. Beat them together first until light and fluffy, which usually takes about 2-3 minutes on medium speed. Adding the powdered sugar gradually will prevent a sugar cloud and help achieve the right texture quickly. If your frosting seems too stiff, a tablespoon of milk can help achieve the ideal spreadable consistency.
For a decorative finish, consider using a piping bag fitted with a star tip to create swirls or rosettes on top of your cake. This will not only make your cake visually appealing but also allow for greater control over the frosting application. Remember to chill your frosted cake for at least 30 minutes before serving; this helps set the frosting and ensures clean slices when serving.
Baking and Storage Tips
Monitoring baking time is crucial for a moist cake texture. With a toothpick test, you want to pull it out clean but not without any moist crumbs; this indicates the cake is perfectly baked. If the edges of your cake are browning too quickly, you can tent them with aluminum foil midway through baking to prevent dryness. Always let your cakes cool in the pans for at least 10 minutes before transferring to wire racks; this helps avoid breakage and keeps them moist.
For storing, this red velvet cake stays fresh for up to a week when covered and refrigerated. If you want to prepare in advance, consider freezing the layers individually wrapped in plastic wrap and aluminum foil. They can last up to 3 months in the freezer. Just remember to thaw them completely in the fridge overnight before frosting, ensuring that you can still achieve that light and fluffy texture.
Ingredients
Gather the following ingredients to bring your Red Velvet Cake to life:
For the Cake
- 2 1/2 cups all-purpose flour
- 1 1/2 cups granulated sugar
- 1 teaspoon baking soda
- 1 teaspoon salt
- 1 teaspoon cocoa powder
- 1 1/2 cups vegetable oil
- 1 cup buttermilk, room temperature
- 2 large eggs, at room temperature
- 2 tablespoons red food coloring
- 1 teaspoon vanilla extract
- 1 teaspoon white vinegar
For the Frosting
- 1 cup unsalted butter, softened
- 8 oz cream cheese, softened
- 4 cups powdered sugar
- 1 teaspoon vanilla extract
- 1-2 tablespoons milk, as needed
Make sure to have everything ready before you start baking for a smooth process!
Instructions
Follow these steps to create the perfect Red Velvet Cake:
Prepare the Oven
Preheat your oven to 350°F (175°C) and grease two 9-inch round cake pans.
Mix Dry Ingredients
In a bowl, whisk together the flour, sugar, baking soda, salt, and cocoa powder until well combined.
Combine Wet Ingredients
In a separate bowl, mix the oil, buttermilk, eggs, food coloring, vanilla extract, and vinegar until smooth.
Combine Mixtures
Gradually add the dry ingredients to the wet mixture, mixing until just combined. Avoid overmixing.
Bake
Divide the batter evenly between the prepared pans and bake for 25-30 minutes, or until a toothpick inserted comes out clean.
Cool and Frost
Let the cakes cool in the pans for 10 minutes, then transfer to wire racks to cool completely before frosting.
Prepare the Frosting
In a bowl, beat the softened butter and cream cheese until creamy. Gradually add the powdered sugar and vanilla, mixing until smooth, adding milk as necessary.
Assemble the Cake
Place one layer of cake on a serving plate, spread a layer of frosting, then add the second layer and frost the top and sides.
Serve your delicious Red Velvet Cake and enjoy!
Pro Tips
- To enhance the red color, use gel food coloring instead of liquid. Additionally, letting the cake sit overnight in the fridge can intensify the flavors.
Creative Serving Suggestions
This Red Velvet Cake pairs beautifully with fresh berries or a scoop of vanilla ice cream, adding a contrasting tartness that enhances the overall flavor. Consider serving it with a drizzle of chocolate or raspberry sauce on the plate for added flair. If you're feeling adventurous, try layering slices with whipped cream and fruit for a decadent dessert for your Valentine’s Day meal.
For a fun twist, create red velvet cake pops using leftover cake scraps. Simply crumble the cooled layers, mix with a bit of frosting, shape into balls, and dip in chocolate. These bite-sized treats can be a delightful addition to any sweet table and are perfect for sharing or gifting during special occasions.
Troubleshooting Common Issues
If you find that your cake layers are sinking in the middle, it could be due to underbaking or excessive moisture in the batter. Make sure to measure your wet ingredients accurately and avoid overmixing, which can introduce too much air and cause the layers to collapse. Consider baking for a few extra minutes while keeping an eye on the edges for doneness.
Should your cake emerge too dry, it's often due to overbaking. Make sure to check your cakes on the lower end of the baking time range, as ovens can vary. If you do end up with a dry cake, a light soak of simple syrup (equal parts sugar and water boiled and cooled) can help reintroduce moisture without compromising the flavor.
Scaling the Recipe
This recipe can easily be scaled for larger gatherings. Simply double the ingredients for a four-layer cake or a larger sheet cake. Keep in mind that you will need to adjust the baking time, typically increasing it by about 5-10 minutes, depending on the thickness of your layers. Consider alternating between standard-sized and mini cake pans for a visually appealing assortment when scaling up.
For smaller gatherings or a more personal dessert, you can halve the recipe and bake in smaller pans or even create cupcakes! This not only reduces leftovers but also allows for individual servings, making it easier to enjoy without a fuss. Just be sure to adjust baking times accordingly, as cupcakes generally bake faster than standard cake layers.
Questions About Recipes
→ Can I use a substitute for buttermilk?
Yes, you can make a homemade buttermilk by adding 1 tablespoon of vinegar or lemon juice to 1 cup of milk and letting it sit for 5-10 minutes.
→ How do I store leftover cake?
Store leftover cake in an airtight container in the refrigerator for up to 5 days, or freeze for longer storage.
→ What can I use instead of cream cheese?
You can substitute cream cheese with mascarpone cheese for a different flavor or use a dairy-free cream cheese alternative.
→ How long does it take to bake the cake?
The cake typically bakes for 25-30 minutes at 350°F. Keep an eye on it, as baking times can vary.
Red Velvet Cake for Valentine’s Day
Created by: Fern Holloway
Recipe Type: Holiday Planning
Skill Level: Intermediate
Final Quantity: 8 slices
What You'll Need
For the Cake
- 2 1/2 cups all-purpose flour
- 1 1/2 cups granulated sugar
- 1 teaspoon baking soda
- 1 teaspoon salt
- 1 teaspoon cocoa powder
- 1 1/2 cups vegetable oil
- 1 cup buttermilk, room temperature
- 2 large eggs, at room temperature
- 2 tablespoons red food coloring
- 1 teaspoon vanilla extract
- 1 teaspoon white vinegar
For the Frosting
- 1 cup unsalted butter, softened
- 8 oz cream cheese, softened
- 4 cups powdered sugar
- 1 teaspoon vanilla extract
- 1-2 tablespoons milk, as needed
How-To Steps
Preheat your oven to 350°F (175°C) and grease two 9-inch round cake pans.
In a bowl, whisk together the flour, sugar, baking soda, salt, and cocoa powder until well combined.
In a separate bowl, mix the oil, buttermilk, eggs, food coloring, vanilla extract, and vinegar until smooth.
Gradually add the dry ingredients to the wet mixture, mixing until just combined. Avoid overmixing.
Divide the batter evenly between the prepared pans and bake for 25-30 minutes, or until a toothpick inserted comes out clean.
Let the cakes cool in the pans for 10 minutes, then transfer to wire racks to cool completely before frosting.
In a bowl, beat the softened butter and cream cheese until creamy. Gradually add the powdered sugar and vanilla, mixing until smooth, adding milk as necessary.
Place one layer of cake on a serving plate, spread a layer of frosting, then add the second layer and frost the top and sides.
Extra Tips
- To enhance the red color, use gel food coloring instead of liquid. Additionally, letting the cake sit overnight in the fridge can intensify the flavors.
Nutritional Breakdown (Per Serving)
- Calories: 380 kcal
- Total Fat: 26g
- Saturated Fat: 15g
- Cholesterol: 195mg
- Sodium: 85mg
- Total Carbohydrates: 32g
- Dietary Fiber: 3g
- Sugars: 24g
- Protein: 6g